


Knitting for beginners: mistakes to avoid (and how to fix them 🎯)
Knit SisShare
“When we were little, our grandmother used to tell us: ‘Knitting isn’t about having perfect hands, it’s about learning from your mistakes.’”
If you're new to knitting — or if you've already tried your hand at it a bit — you've probably encountered these little problems: a twisted beginning, a missing yarn, lost stitches, a shape that slips... Don't panic, it's normal (and it happens even to the most experienced 💛).
In this article, we share with you the most common mistakes when you start knitting , our tips for avoiding them, and concrete advice inspired by our own Knit-sis patterns. At the end, you'll have a clear roadmap for knitting with confidence, avoiding disappointments... and embarking on a beautiful project with confidence.
Who is this article for?
▪️ For you who want to start knitting without frustration.
▪️ For those who already have a first project but feel blocked by irregularities.
▪️ For those who want to progress towards colorful or more ambitious models (twists, lace, raglan, etc.).
👉 By the way, if you want to receive every new tutorial, subscribe to our newsletter
1. Casting on stitches that are too tight (or too loose): the invisible trap
Why this is a common mistake
Casting on is the very beginning: if the tension is wrong at this stage, you risk compromising the evenness of the entire project. A stitch that's too tight makes it difficult to knit the next row, while a stitch that's too loose makes the edge fuzzy or uneven.
This mistake is often cited among the “top 5 knitting mistakes that all beginners make” notably in the Histoire de Mailles article
Tips to avoid it
▪️ Start the cast-on with a needle half a size larger than the body size, then change to your normal size on row 1.
▪️ Relax your hand, don't hold the wire too tightly. Sometimes breathing deeply or relaxing your shoulder helps.
▪️ Cast on 20 “test” stitches, check their tension, undo them and start again if necessary.
▪️ Use a “swatch” wire to test the tension (without sacrificing anything immediately in your beautiful project).
Remember : Editing is the foundation of your work. If it's poorly done, everything will go wrong.
2. Not taking a sample or neglecting to take one
The vital importance of the sample
A swatch (usually a 10 x 10 cm square) allows you to check that your knitting will have the right dimensions once worn. Without it, you could knit for hours... only to end up with a garment that's too big or too small for you. This warning comes up in all the good articles on mistakes to avoid.
What you absolutely must do
-
Knit your swatch with the yarn and needles recommended in the pattern.
-
Wash it/block it in the conditions you will give to your finished work (water, dry flat).
-
Measure exactly the number of stitches and rows per 10 cm.
-
If your tension does not match, adjust: change needles (larger or thinner) or adjust your movement.
-
Note your tension in your project notebook: number of stitches / 10 cm, instructions, comments.
➡️ No sample = high risk that your model will not render as expected.
3. Read the pattern… like a letter upside down
Common mistake: starting without understanding
Many beginners skip this step: they grab the yarn and needles and start "by feel" without reading the pattern. A mistake! This leads to misunderstandings, following the wrong size, or getting lost in abbreviations.
How to do a “strategic reading” of the boss
▪️ Start by highlighting the size you want to knit .
▪️ Identify tricky passages (increases, decreases, openwork patterns, cables).
▪️ Note down any unknown abbreviations or symbols; prepare a glossary or visual shortcut.
▪️ Mentally visualize the structure of the work (front, back, sleeves).
▪️ If the pattern offers a graph (diagram) or diagram, take the time to study it before knitting.
👉 It sounds like “wasted time,” but it’s time saved: you waste less time unraveling.
4. Forgetting to count stitches — or adding them unintentionally
The Silent Disaster
You had 48 stitches... then 45, or 50, without having intentionally increased: this is the classic error of “lost or added stitch”. Result: your project becomes distorted, becomes wider or tighter, or loses its symmetry.
Best practices
▪️ Count your stitches at the end of each row, especially on “critical” rows.
▪️ Place a marker at the beginning of the row so as not to confuse the ends.
▪️ When increasing/decreasing, note where you are to easily find the passage.
▪️ If the number of stitches does not match, stop, retrace a few stitches, identify the error, and correct it immediately.
Remember : check often = avoid disaster at the end of the project.
5. Changing balls in the middle of a row — the invisible flaw
Why it's risky
When you get to the end of a ball, many people think, “I’ll finish this row and change it later.” The catch: This can create a visible ridge or different tension in the middle of the row.
Simple tip
▪️ Play it safe: change balls at the beginning of a row , or as soon as you see that you have little yarn left for it.
▪️ Estimate the length of the row (number of stitches × thickness of the yarn) to know if you can finish or not.
▪️ If you absolutely must change mid-row, do it decoratively (e.g. in a patterned section, use it as an accent) — but only if you have experience.
6. Knitting with too tight (or too loose) tension
The “tight” or “flag” syndrome
Some beginners fear that the knitting will "unravel" and tighten it too much. The result? A stiff, difficult-to-work-with knit that's uncomfortable to wear. Conversely, knitting too loosely results in a piece that lacks structure. This frequently comes up in articles on mistakes to avoid.
Adjust the tension
▪️ Maintain a comfortable posture: shoulders relaxed, free filament.
▪️ Change needle material if necessary (bamboo slips less than metal).
▪️ Every 5–10 cm, drop the work, observe the natural relaxation of the thread, then adjust.
▪️ If you see a stitch that is too loose or a stitch that is too tight in the row, correct it immediately (before many rows are built on it).
7. Ignore a “small” mistake and move on
The error that transforms
You see a stitch drop, a misaligned pattern, a hole... but you continue, telling yourself "we'll see later." The result: the error becomes visible in XXL, difficult to correct, and often you end up unraveling everything.
Better to correct it right away
▪️ As soon as you see an anomaly, stop.
▪️ Untie a few rows if necessary, correct, then start again.
▪️ Learn how to “partially undo” without losing everything, or how to use a small hook to pick up a dropped stitch.
▪️ Note the error in your project notebook: what it was, where it was, how you fixed it — this will teach you a lot for the future.
8. Forgetting to block/dry flat
The botched “end of the project”
After all this work, not blocking or drying your knitting flat can ruin the shape: the knitting can stretch under its own weight.
Good blocking steps
-
Wash gently (often in lukewarm water, without harsh spinning).
-
Wrap in a towel to remove excess water.
-
Lay your work flat on a flat surface, respecting the expected dimensions, and pin it if necessary.
-
Allow to dry completely before handling or wearing.
This step really finalizes your work: the patterns are smoothed out, the measurements are “placed”.
9. Choosing a project that is too complex to start with
The “gentle suicide”
Enthusiasm can sometimes give you wings: starting a cable-knit, lace, or jacquard cardigan when you've never finished a simple snood... is condemning yourself to abandonment. Advice articles remind us: choosing a model suited to your skill level is an essential reflex.
Our Knit-sis recommendations for beginners
▪️ Opt for a top-down, seamless model with a simple stitch.
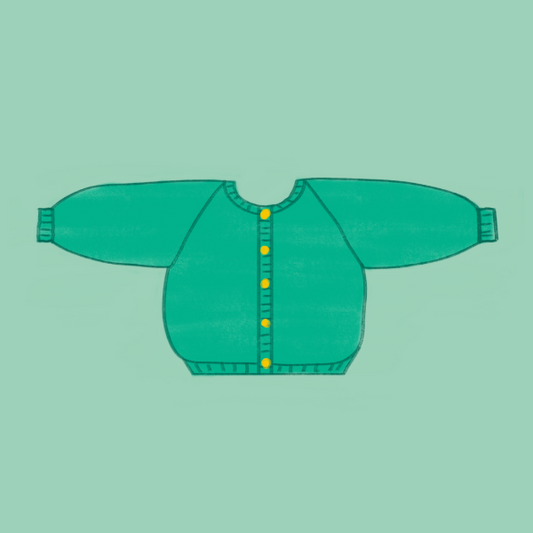
▪️ Start with Cardichou (Le Gilet Chou) : raglan, top-down, very accessible — perfect to get you started. → See the boss
▪️ If you want a “sweater” model, Doudou is super soft and ultra friendly (free) — a great first adventure. → See the free pattern
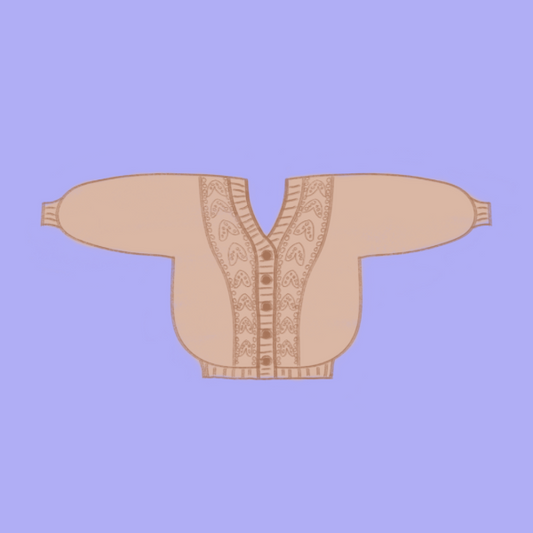
▪️ Once you feel confident, try Festi , an accessible round cardigan with a simple construction. → See the boss
💡 The goal: to have a project that you really want to finish, not an overly ambitious model that will stay at the bottom of a drawer.
10. Not planning for enough wool (or not anticipating the margin)
The “zero quantity” error
You buy exactly the amount indicated on the pattern... then during the process, you run out of yarn. The result: duckbill, different yarn colors, or an inability to finish. This is a classic mistake reported on knitting blogs.
The good rule
▪️ Take at least 10% more wool (or even 15% depending on the thickness/looseness of the yarn).
▪️ If the pattern mentions several sizes, check carefully for the size chosen.
▪️ If you change the voltage slightly, allow a little more.
▪️ Keep a spare ball in a corner in case the yarn is no longer available later.
Conclusion
In summary, to knit with confidence when you start:
▪️ Take care with the assembly (correct tension)
▪️ Make a serious sample
▪️ Read your pattern before you start
▪️ Count the stitches often
▪️ Change balls at the right time
▪️ Fix errors as soon as they appear
▪️ Block your work flat
▪️ Choose a model adapted to your level
▪️ Bring enough wool
At Knit-sis, we've created designs to help you take that first step— Cardichou, Doudou, and Festi aren't just here by chance; they're all "first steps" pieces with our family-friendly knitting heart. If you want to take it further, take a look at our full collection of modern cardigans to inspire you.
👉 Discover the patterns for beginners (vests, sweaters, tops) in our Knit-sis store → (Discover the collection)
👉 Subscribe to the newsletter to receive our next guides, tips and exclusive patterns
You're already on the right track. Trust us, with a little care and patience, you'll turn those "mistakes" into small knitting victories. Happy knitting to you 🧶
— Lenny & Louise