


Knitting and finishing techniques: how to make your project look professional?
Knit SisShare
You love knitting, choosing your yarns, creating your pieces… but when it comes to finishing, you stumble? Blurry edges, visible seams, a shape that's not quite “professional”?
No panic! We, Lenny and Louise, two sisters who founded Knit-sis, learned to knit from our grandmother and our aunt, and we have slipped into our projects all the “tricks” that transform a beautiful piece of work into a truly neat garment.
In this article, we'll show you how to apply the right finishing techniques to make your knitting look like it was done by a pro , even if you're a beginner 😉
We will cover: why finishing touches matter, key techniques (edgings, seams, blocking), and how to apply them to your Knit-sis designs.
👉 Ready to give your knitting a "magazine" finish? Then let's go!
1. Why knitting finishes make all the difference
Finishes = difference between “homemade” and “professional handmade”
When you finish a knitting project, it's not just the finished piece you put on the table; it's the image you'll wear , the outfit you'll adore. A pulled edge, a visible seam, an unblocked piece: all of these diminish the "wow" factor. According to an expert guide: "These final steps can be the most important of the knitting process… they ensure your garment looks lovingly handmade rather than like a homemade mess." Vogue Knitting Magazine
At Knit-sis, we consider a pattern not to be “finished” until the finishing is neat.
📝 Key takeaway: We spend as much time on the finishing touches as on the knitting itself.
If we neglect this step, we lose in appearance, elegance, and longevity.
The consequences of shoddy workmanship
▪️ The edges roll up or don't hold.
▪️ The seams become “weak points” with use.
▪️ Blockage (or lack of blockage) prevents the part from taking its optimal shape.
▪️ We don't want to wear the item, or show it off.
💡 At Lenny & Louise, we remember our first “failed” vest because of a poorly done block that day, we told ourselves that we had to learn to block like pros.
2. Essential finishing techniques for a professional look
5 essential techniques (edgings, seams, blocking…)
1️⃣ Stop / Bind off : choose the correct method for the edge (standard, elastic, tubular)
2️⃣ Weaving in ends / tucking the threads in properly : invisible on the surface, secure
3️⃣ Seaming / Invisible Seams : side seams, shoulders, sleeves, using techniques such as mattress stitch or 3-needle bind-off
4️⃣ Edge treatment / edge finishes : I-cord edging, studs, small decorative touches.
5️⃣ Blocking : gives shape, legibility to the pattern, and structure to the garment
A closer look at the often-forgotten "pro" key lock
Blocking is a bit like "pressing" a knitted garment: it allows you to adjust the dimensions, flatten the stitches, open up an openwork pattern, and give it a crisp, clean look. Several experts recommend not skipping this step.
Tip: After assembling your pieces (seams made, threads tucked in), block them immediately before wearing.
Knit-sis trick: lay the piece down still slightly vaguely, then pin it, spray it, let it dry flat — and watch the “metamorphosis”.
✅ Key takeaway: Even a simple stitch (e.g., stockinette stitch) becomes much more "professional" after blocking.
3. Apply these techniques to your Knit-sis patterns
Concrete example: finishing touches on a beginner's model
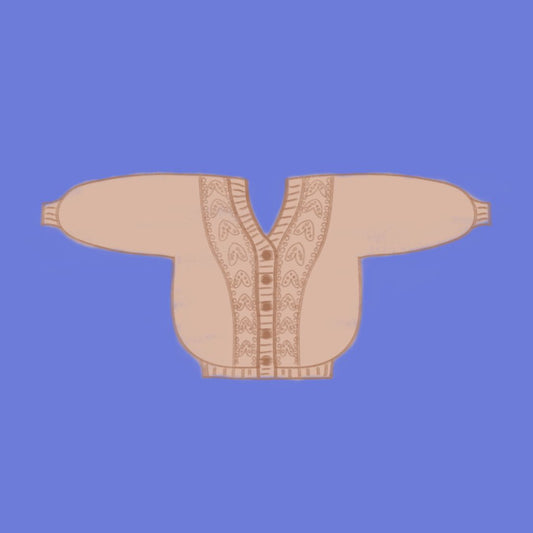
Let's take the model Cardichou (The Cabbage Vest) : raglan, top-down, soft, ultra-accessible.
▪️ For the edges: choose an elastic stopper if you are using a soft yarn.
▪️ For the seams: the raglan seam is often invisible once properly assembled — the mattress stitch is recommended.
▪️ For blocking: even after a simple easy vest, blocking refines the raglans and calms any potential “bulging” of the yarn.
👉 Want to see how we do the finishing? Check out our Cardichou pattern and follow the built-in assembly instructions.
Switching to a “technical + high-quality finish” model
Looking to upgrade? The model Marguerite — romantic openwork stitch is the perfect excuse to apply refined borders, invisible stitching and neat blocking.
Why the finishing touches boost conversion (your enjoyment + your motivation)
When your knitting looks like “something you’re proud of,” you wear it, you show it off, you recommend it—and that reinforces your desire to continue, to buy more patterns. Like the model Festi – modern, easy access – it becomes more valuable when the finishes are well done.
At Knit-sis, we value not only the pattern and color, but also the visible quality : this is what will make you proudly say “yes, I knitted it myself”.
💬 Conclusion – You too can give your knitting a “magazine” look
You now have all the tools you need to go from "fun knitter" to "pro knitter." By applying the right finishing techniques—appropriate binding off, invisible stitching, and proper blocking—you can transform your projects into pieces you'll be proud of.
👉 To start: take a model you love, like Cardichou , apply at least one "special" finish (e.g. tubular border or I-cord) — you'll see the difference.
👉 And most importantly, Sign up for our newsletter to receive the PDF guide + be the first to know when a new model arrives (psst… a surprise twisted model is coming soon 😉)
Knit with love, do it well, and wear your creation with pride 💖
— Lenny & Louise


