The different types of knitting stitches (and how to master them step by step)
Knit SisShare
Introduction
You sit there, needles in hand, and you think to yourself: "Now, which stitch am I going to choose?"
Whether you've just finished your first row, or you already have a few projects behind you, understanding the different types of knitting stitches (and knowing how to master them) is a real key to making your creations richly textured, harmonious and rewarding.
At Knit-sis, we started knitting with our grandmother and our aunt — we experimented, started again, invented our own tricks — and today, we want to give you all that knowledge without burdening you with unnecessary jargon.
In this article, you will discover:
▪️ A clear overview of the types of stitches (from the simplest to the most creative)
▪️ Practical tips for success (and avoiding pitfalls)
▪️ Knit-sis pattern ideas where you can apply (and practice) these stitches
▪️ A handy reminder to keep, resources to download, and gentle CTAs to join our community
👉 In the end, you will not only be able to name the stitches, but knit them with confidence .
1. The basic points (essential foundations)
Before you start indulging in fantasies, make sure you have a good grasp of the basics: they are essential for everything else.
1.1 Garter stitch
▪️ Definition & finish : Knit each stitch, row after row. Garter stitch is completely reversible.
▪️ Why it's useful : it's the first stitch you learn, perfect for scarves, borders, for practicing regularity.
▪️ Trap to avoid : do not pull too hard, otherwise the stitches become tight; pay attention to the tension — the yarn should slide freely.
▪️ Knit-sis tip : when Lenny and I (Louise) worked side by side, we often compared our garter rows — this helped us detect if one of us was "tightening" too much.
1.2 Stockinette stitch (knit stitch / purl stitch)
▪️ Definition & finish : alternate a row of knit stitches, then a row of purl stitches. The finish is smooth on one side, "slightly wavy" on the other.
▪️ When to use it : for simple sweaters, cardigans, tops where a smooth effect is desired.
▪️ Tension tip : we often knit a little looser in stockinette stitch if we plan to add fancy stitches later.
▪️ “Reverse stockinette” variant : you can start with a reverse row for the readability of the pattern, depending on what is required.
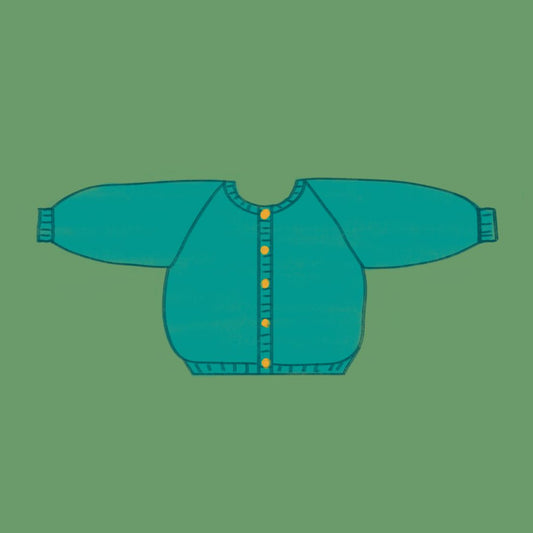
▪️ Ideal model for applying it : the Cardichou (The Cabbage Vest) See the Cardichou pattern .
1.3 Rib stitches (1/1, 2/2, beaded rib…)
▪️ Definition & appearance : alternate knit and purl stitches in the same row (for example 1/1 = one knit stitch, one purl stitch). This stitch is elastic.
▪️ Usefulness : excellent for edges (cuffs, sweater bottoms, necklines).
▪️ Variants & textures :
• 2/2 ribbing: two knit stitches, two purl stitches
• Beaded ribbing: a mixture of double stitches or beaded stitches (see advanced section)
▪️ Tip : for a really soft edge, knit the ribs a little looser than the body of the knitting.
Key takeaway : garter stitch, stockinette stitch and ribbing are the basic building blocks — if you get stuck (motivation, tension, consistency), come back here.
2. Intermediate stitches & fancy stitches (textures welcome)
Once you have the basics down, you can explore textures and patterns that add character to your work.
2.1 Rice point (grain of rice) / wheat point
▪️ Principle : alternate knit stitch / purl stitch within the same row, as well as from one row to the next.
▪️ Result : a regular “granular” texture, very pretty for blankets, summer vests, accessories.
▪️ Tips : Distribute the stitches evenly to ensure a consistent pattern. Seed stitch is less stretchy, so allow for some ease.
2.2 Godron stitch (or godron stitch)
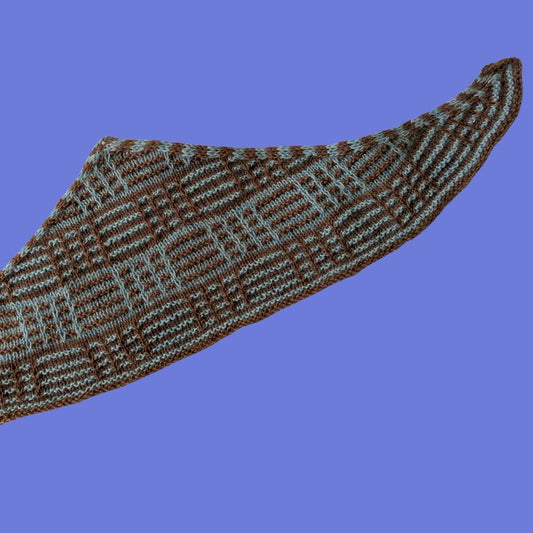
▪️ Principle : alternate rows of stockinette stitch (or rows of a single type) and rows of reverse stockinette stitch or other stitches. This creates raised horizontal bands.
▪️ Why use it : to visually structure a work (texture stripes), to give rhythm.
▪️ Tip : watch out for rolling — incorporating foam edges or ribs can help.
2.3 Elongated stitches / “long row” / “long stitch”
▪️ Principle : a stitch is stretched (double turn of yarn, yarn over or other method depending on the style), to create a more airy, “dreamy” effect.
▪️ When it's useful : in summer tops, light sections of a vest, subtle details.
▪️ Caution : this type of stitch can become fragile if used too much — always counterbalance it with something solid (foam, jersey) around it.
2.4 Mixing of dots (“mixing of textures”)
▪️ Classic example: mixing garter stitch with stockinette stitch, or slipping a few stitches into a regular pattern to break the monotony.
▪️ Lenny's tip: we often turn the technical rows right after a garter row, to "breathe" the pattern a little.
▪️ Relevant Knit-sis pattern : the Festi , with its simple sections and slight variations — See the Festi pattern .
3. Advanced stitches: twists, openwork, intarsia, raised patterns
Here, we delve into enriching but sometimes more demanding techniques — but not impossible, I promise 🙂
3.1 Twists / Cross Stitches
▪️ Principle : stitches are crossed (placed on an auxiliary needle in front or behind, then picked up again). This creates raised patterns (ropes, braids).
▪️ Pro tip : for a 4-stitch right-hand twist, you can slip 2 stitches onto an auxiliary needle behind, knit the next 2, then pick up the 2.
▪️ Common pitfalls : forgetting to include the auxiliary needle, pulling too hard on the crossings.
▪️ Knit-sis pattern for practice : Twist & Shout (cable pattern) is perfect. → See the Twist & Shout pattern
3.2 Openwork stitches / lace
▪️ Principle : create “holes” in the knitting via yarn overs , decreases (slip stitches, 2 stitches together…) .
▪️ Basic rule : each yarn over must be compensated by a decrease so that the number of stitches remains constant.
▪️ Tension tip : knit a little looser so that the holes are visible without distorting the knitting.
▪️ Recommended pattern : Marguerite (romantic openwork pattern) — See the Marguerite pattern
3.3 Intarsia / jacquard
▪️ Jacquard (pulled threads) : small repeating patterns are made by changing colors, keeping the "pulled" threads at the back.
▪️ Intarsia : for large blocks of color, small independent skeins (or bobbins) are used.
▪️ Challenges : even tension, avoid wires pulling, cross wires to avoid holes or loose spaces.
▪️ Inspiring Knit-sis patterns :
- Splashie (colored intarsia) → See Splashie
- Mondrian (geometric patterns) → See Mondrian
3.4 Raised dots / textured patterns
▪️ Noppes, bobbles : small raised balls added occasionally
▪️ Double stitches, English ribbing : some stitches are "knitted twice" to create volume
▪️ Twisted stitches : knit a stitch at the back to “twist” it
▪️ Tip: test first on a sample, to check the finish and flexibility.
4. When to choose which point?
Here are some criteria to keep in mind:
|
Criteria |
What this affects |
Practical advice |
|
Elasticity / Fit |
The intricate patterns (cables, openwork) draw the knitting |
Add 5–10% margins in width if you are mixing rigid stitches. |
|
Weight & drape |
Many textures add thickness to the work |
If you want a lightweight vest, keep some sections in jersey or elongated knits. |
|
Style & readability |
A complex pattern on a very fancy thread can "get lost" |
Choose a plain (or lightly textured) yarn to clearly see the pattern. |
|
Difficulty & duration |
Some points require concentration and time. |
Start an advanced pattern on a secondary piece (scarf, sleeve) before applying it to the body |
Key takeaway : you can mix the stitches according to the area (bases, sleeves, panels) — this creates a nice “patchwork of textures” effect.
5. Practical tips & common mistakes
5.1 How to read a point diagram/grid
▪️ The grids read the horizontal rows; each square = one stitch
▪️ Essential key: what the throw, overcast, crossing, etc. represent.
▪️ On the reverse side: some symbols change (reverse crossing, reverse decrease) — always check the legend.
5.2 Use markers & guides
When you have patterns or repetitions, place markers: it will prevent you from getting lost.
It is often placed after a central motif or before/after a repetition.
5.3 Knitting samples
Always make a swatch (10 × 10 cm) in the stitch and yarn you are going to use — this allows you to check your tension, the result, and adjust the size.
5.4 Blocking / “wringing out” your knitting
Some stitches (openwork, twists) reveal their full charm after blocking (moistening + shaping).
Don't skip this step, it can elevate your work.
5.5 Practice in small sections, with accessible projects
If you want to practice a new stitch, start with a sleeve section or a side panel: you risk less in terms of time & investment.
For example, the Aude vest (with delicate lace) can serve as a “practice ground”. → See the boss Aude
6. Video Tutorials “Keep handy”
🎥 Video Tutorials
Find here 3 tutorial videos to practice more or less classic techniques
We begin with the Broccoli point
Then the Suvine point
And back to the classics with garter stitch, stockinette stitch and 1x1 ribbing.
Conclusion
Knitting different stitches is like playing with textures, reliefs, and moods; it transforms a simple garment into a piece that tells a story. By mastering the different types of knitting stitches , you expand your creative universe and give more character to each project.
If you want to progress without feeling lost, join the Knit-sis newsletter : every month, we send you a stitch tip, a mini-challenge, an exclusive promo.
👉 [Sign up for the newsletter here]
And if you want to get your hands dirty, check out our pattern collection!
→ Browse the Knit-sis collection
→ Start with Cardichou or Festi to combine simplicity and pleasure (and gently discover the textures)
Finally, leave us a short message in the comments (or on Instagram): what point would you absolutely like to learn? We could cover it in a future article or video tutorial 😊


