






How to Add a Buttonhole After Finishing Your Knitted Project
Knit SisShare
We've all been there: you proudly finish your cardigan or sweater… and then realize you've forgotten the buttonholes. Don't panic, it's not too late! Making a buttonhole on a finished knit is much simpler than it seems. In this guide, we'll explain step-by-step how to create neat and functional buttonholes on your finished project, without unraveling, without cutting, without picking up stitches, without starting over.
Why add a buttonhole after finishing your knitting?
Mistakes and last-minute changes are part of knitting. Maybe you decided to add buttons after seeing the final result, or you realized that the planned placement wasn't ideal. Whatever the reason, there's no need to undo all your hard work. This method allows you to adapt and customize your work even after binding off, and it works on cardigans, sweaters, bags, and much more.
Materials needed
- Your finished knitted item
- A tapestry needle (wool needle)
- Matching thread (or contrasting if you want the buttonhole to stand out)
- Pins or stitch markers
- The intended buttons (to check the size as you go)
Step-by-step: how to make a buttonhole on a finished knit
Step 1 - Choose the placement
Lay your work flat and decide where to place the buttonholes. Use pins or stitch markers to mark the locations. Be sure to space them regularly, which is particularly important for a row of buttons on the front of a cardigan.
💡 Knit Sis Tip: Place your buttons directly on the fabric before marking, and take a photo to ensure the spacing is harmonious before cutting anything.
Step 2 - Open the stitch
Using your button, gently spread the stitch. Pass through several times to widen them and create the necessary space for the button to pass through.
Step 3 - Reinforce the opening
Once the opening has been created, take a needle and thread. You will sew all around the opening to reinforce it and secure it as is.
📹 VIDEO
For more clarity, we've prepared this tutorial for you
Test the button
Slide the button into the buttonhole to check if the size is correct:
- Too tight? Re-stitch to space it out further
- Too loose? Add extra reinforcement stitches to slightly reduce the opening.
Pro tips for a professional-looking buttonhole
- Adjust the thread weight: for lightweight projects, use a fine thread to avoid overly thick edges; for thicker knits, choose a strong thread so the buttonhole lasts.
- Use an appropriate needle: a slightly finer tapestry needle makes it easier to pass between stitches when reinforcing without stretching them out.
- Follow the direction of the knitting: when reinforcing, work in the direction of the stitches so your buttonhole lies flat without puckering.
- Block the finished buttonhole: a light steam blocking after reinforcement helps the edges stabilize neatly, especially on wool projects.
Which Knit Sis patterns are best suited for this technique?
This technique is particularly useful on all projects with a button band, and we have several patterns where it makes all the difference:
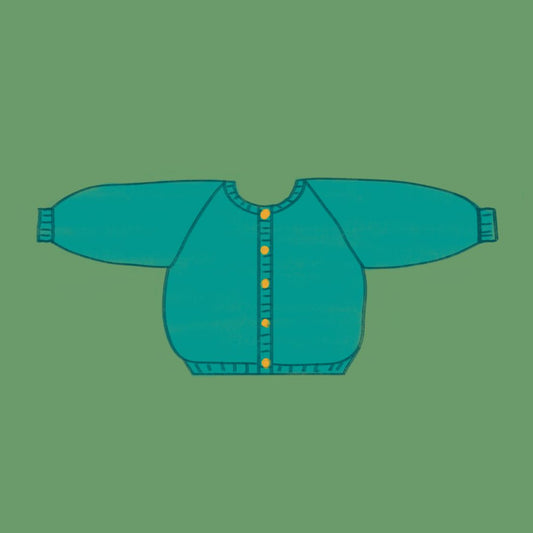
- Cardichou — our top-down raglan cardigan with a simple button band, perfect for trying this technique on a project accessible to beginners.
- Festi Cardigan — a colorful sleeveless top where a well-placed buttonhole can completely transform the look.
- Elmer Cardigan — a graphic jacquard cardigan where the precise placement of buttonholes is essential for the final silhouette.
Were you looking for this tutorial in another language?
This technique goes by different names in various knitting communities:
- 🇳🇱 Achteraf knoopsgat maken in breiwerk (Dutch) adding a buttonhole to a finished knit, which is exactly what this tutorial covers.
- 🇩🇪 Knopfloch stricken ohne abketten / Knopfloch nachträglich in Strickjacke (German) to incorporate a buttonhole into a finished cardigan, without unraveling it again: this is exactly what these instructions show.
- 🇸🇪 Sticka knapphål i efterhand (Swedish) to add a buttonhole to a finished piece, without unraveling the work: that's exactly what this guide is about.
FAQ - Making a buttonhole on a finished knit
Can you make a buttonhole on a finished knit without unraveling it? Yes, that's exactly what this tutorial is about! By delicately cutting a stitch and reinforcing the edges with a blanket stitch or buttonhole stitch, you can create a neat and functional buttonhole on any finished knitted item.
What stitch should I use to reinforce a knitted buttonhole? The blanket stitch provides the neatest finish and best durability. The whipstitch also works very well for a quicker result. Both prevent the cut edges from unraveling over time.
How do I make a buttonhole on the front of a knitted cardigan? Mark the locations with pins, cut a stitch at each spot, create the opening by gently pulling on the cut stitch, then reinforce all around with a tapestry needle and matching thread. Follow the complete step-by-step guide above.
Does this technique work for both vertical and horizontal buttonholes? Yes. For a vertical buttonhole, pull the cut stitch to the side rather than downwards to create the opening. The reinforcement method is the same in both cases.
What if my buttonhole is too small or too large after cutting? If it's too tight, gently undo an additional row of stitches to enlarge the opening. If it's too loose, add extra reinforcement stitches on the edges to slightly reduce it before testing again.
Does this method work with all yarn weights? Yes, but the reinforcement thread must be adapted to your project: fine thread for lightweight knits, stronger thread for projects in bulky or chunky yarn.
Can you make a buttonhole on a knitted bag, not just on garments? Absolutely — this method works on any finished knitted fabric, including bags, pouches, and even knitted home accessories.
How do I make a buttonhole without binding off stitches (Knopfloch stricken ohne abketten)? This tutorial is precisely designed for that: no binding off or picking up stitches is necessary. You work directly into the finished fabric by cutting and reinforcing.
Adaptability is the soul of knitting
Knitting is as much about creativity as it is about technique. Adding buttonholes after finishing your project is a great way to stay flexible and personalize your creations. Whether it's a last-minute adjustment or a deliberate choice, this method ensures that your final project truly matches your vision, even if it evolved along the way.
Want to go further in your knitting techniques?
Explore our complete collection of colorful and inspiring patterns. Knit Sis patterns are designed with detailed tutorials and tips to help you approach each technique with confidence.
And let us know in the comments if you have any questions or if you'd like to discover other knitting techniques with us!


